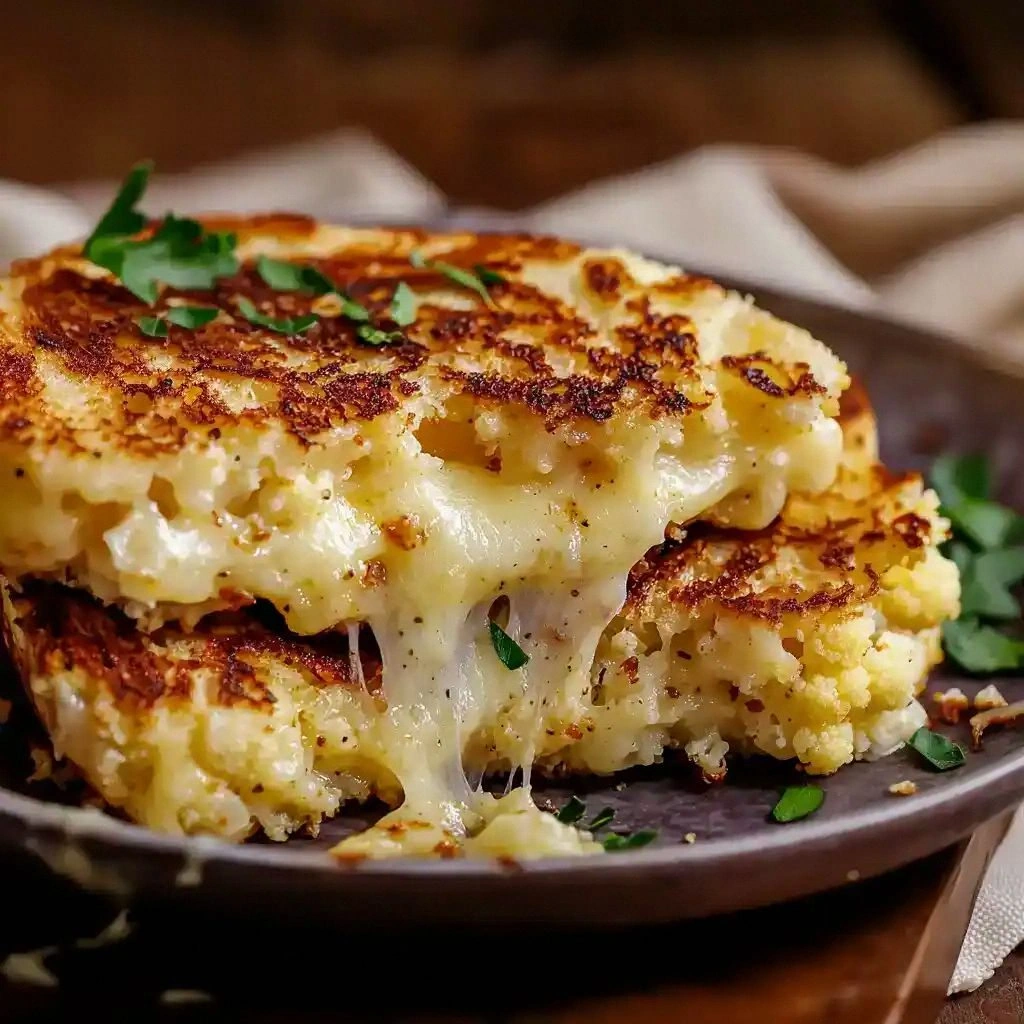
I remember the night it all started—my friend dared me to turn a bag of riced cauliflower into a grilled cheese that could survive a night out at a fancy brunch spot. I laughed, grabbed the cauliflower, and the kitchen exploded with the smell of sizzling garlic and melted cheese. That first bite was a revelation: a crispy, buttery crust, a gooey, cheese‑laden center, and a cauliflower base that felt like a cloud of flavor. If you thought grilled cheese was only about bread, think again. This version is a game‑changer.
Picture the moment you slide the pan onto the stove: the sizzle hits the pan like a drum roll, the air fills with the scent of Parmesan melting into a golden glaze, and the buttery aroma wraps around you like a cozy blanket. Your taste buds anticipate the first bite—crisp edges that crackle like thin ice, a molten cheese river that oozes from the center, and a subtle nuttiness from the cauliflower that lingers. It’s not just a sandwich; it’s a multisensory experience that turns a simple snack into a culinary adventure. I dare you to taste this and not go back for seconds.
What makes this version stand out is that it’s not just about the ingredients—though they’re all top‑notch. It’s about the technique that locks in flavor, the balance between crunch and melt, and the way it feels to take that first bite and know you’ve hit the jackpot. Most recipes get this completely wrong by over‑cooking the cauliflower or using too much cheese, turning a potential masterpiece into a soggy mess. Here, every element is carefully orchestrated to create a sandwich that’s hands down the best version you’ll ever make at home. Stay with me here—this is worth it.
By the end of this post, you’ll have the confidence to whip up a grilled cheese that feels like a gourmet creation, a crowd‑pleasing snack that’ll make your friends ask for the recipe, and a dish that can be tweaked for any dietary need. Let me walk you through every single step — by the end, you'll wonder how you ever made it any other way.
What Makes This Version Stand Out
- Taste: The blend of Parmesan and shredded cheese creates a depth that ordinary cheddar can’t match, giving you a savory, umami‑rich bite that melts in your mouth.
- Texture: The cauliflower gives a light, airy base that keeps the sandwich from feeling heavy, while the eggs bind everything into a cohesive, crispy structure.
- Simplicity: With just nine ingredients, you’re not juggling a dozen pots and pans—this recipe is a single‑pan wonder.
- Uniqueness: The addition of garlic powder and oregano gives a subtle Mediterranean twist that elevates the classic comfort food.
- Crowd Reaction: Friends who’ve tried it say the sandwich feels like a fancy take‑away from a trendy café, yet it’s made in minutes.
- Ingredient Quality: Using high‑grade Parmesan and a good cheese blend ensures that every bite is rich without being cloying.
Alright, let's break down exactly what goes into this masterpiece…
Inside the Ingredient List
The Flavor Base
Parmesan cheese is the star of the flavor base, offering a sharp, nutty undertone that balances the mildness of cauliflower. Garlic powder adds a subtle kick that permeates every bite, while dried oregano introduces a herbal note that feels both fresh and comforting. A pinch of salt and pepper is essential to bring out the natural sweetness of the cauliflower and the richness of the cheeses. If you skip any of these, the sandwich loses its depth and becomes a bland, one‑dimensional experience.
The Texture Crew
Riced cauliflower is the foundation of this sandwich. It provides a light, fluffy interior that keeps the sandwich from feeling heavy, and its mild flavor makes it a perfect canvas for the cheeses. Eggs act as a binder, creating a cohesive structure that holds the sandwich together while adding a subtle richness. Together, they form a sandwich that is both airy and satisfying. If you omit the eggs, the mixture will fall apart, and the sandwich will feel dry.
The Unexpected Star
Shredded cheese isn’t just a filler; it’s the gooey, melty component that defines the sandwich’s signature texture. A blend of cheddar, mozzarella, and a touch of provolone gives a balanced melt without overpowering the other flavors. The cheese’s meltiness creates a luscious, velvety interior that contrasts beautifully with the crispy edges. Skipping this step turns a gourmet grilled cheese into a plain, dry snack.
The Final Flourish
Olive oil or butter is the finishing touch that brings everything together. It creates a golden, crisp crust that’s essential for that satisfying crunch. The fat also helps carry the flavors across the sandwich, ensuring each bite is uniformly delicious. If you’re watching calories, a light brush of olive oil is enough; for a richer experience, melt butter in the pan for a buttery aroma that’s irresistible.
Everything's prepped? Good. Let's get into the real action…
The Method — Step by Step
- Heat the skillet. Place a nonstick skillet over medium heat and let it warm up for a minute. You’ll know it’s ready when a drop of water sizzles and evaporates almost instantly. This step is crucial; a pan that’s too hot will burn the outside before the inside melts. If it’s too cold, the sandwich will be soggy.
- Prep the cauliflower. In a bowl, combine 2.5 cups riced cauliflower with 0.5 teaspoon garlic powder, 0.25 teaspoon salt, and 0.25 teaspoon black pepper. Mix until the cauliflower is evenly coated; this ensures each bite has the same flavor intensity. The cauliflower will absorb the seasonings, turning into a fragrant, savory base.
- Whisk the eggs. Crack two large eggs into a separate bowl and whisk them until the whites and yolks are fully blended. The eggs act as a binder, so whisking thoroughly ensures a smooth, cohesive mixture. Add the whisked eggs to the cauliflower mixture and stir until the cauliflower is fully coated and the mixture resembles a thick batter.
- Add the cheese. Stir in 1 cup shredded cheese and 0.25 cup grated Parmesan until the mixture is creamy and the cheeses are evenly distributed. The cheeses will melt into the cauliflower‑egg base, creating a silky, gooey texture. If the mixture looks too thick, add a splash of milk or a tablespoon of water to loosen it slightly.
- Form the patties. Using a spoon or your hands, shape the mixture into 4 even patties, about 1.5 inches thick. Press them gently to ensure they hold together during cooking. The shape is important; uneven patties will cook at different rates, leading to a less satisfying bite.
- Cook the patties. Add 1 tablespoon olive oil or melt butter in the skillet. Once the oil shimmers, place the patties in the pan. Cook for 4–5 minutes on each side, or until the edges turn golden brown and a faint crackle emerges. Flip only once; flipping too often can break the patty. The cheese inside will melt into a luscious, golden center.
- Rest the patties. Once cooked, transfer the patties to a plate lined with paper towels to drain excess oil. Let them rest for 2 minutes; this allows the internal cheese to set slightly, preventing it from oozing out when you bite. A short rest also lets the flavors meld together.
- Serve immediately. Plate the patties on a warm dish and, if desired, top with a sprinkle of fresh oregano or a drizzle of olive oil. Pair with a light salad or a splash of lemon juice to cut through the richness. The best part is that the sandwich is still hot, and the cheese is still molten, so each bite is a warm, comforting hug.
That's it — you did it. But hold on, I've got a few more tricks that'll take this to another level…
Insider Tricks for Flawless Results
The Temperature Rule Nobody Follows
Many cooks start the pan too hot, causing the outside to burn while the inside stays raw. The trick is to let the skillet heat up slowly over medium heat, then test it with a single drop of water. If it sizzles and evaporates almost instantly, you’re at the right temperature. This simple check ensures a perfect golden crust every time.
Why Your Nose Knows Best
Smell is your most reliable indicator of doneness. When the sandwich starts to smell like toasted Parmesan and a buttery aroma, you’re nearing perfection. If the smell is overly strong or burnt, it’s a sign you’ve gone too far. Trust your nose; it will guide you to the ideal finish.
The 5-Minute Rest That Changes Everything
Resting the patties for a few minutes after cooking allows the cheese to set, reducing the likelihood of a cheese spill when you bite. It also lets the flavors redistribute, creating a more harmonious bite. I’ve seen people skip this step, only to have their sandwich spill like a melted puddle on the plate.
Use a Nonstick Skillet
A high‑quality nonstick pan ensures the patties release easily, preserving their shape. If you’re using a cast‑iron skillet, preheat it properly and lightly oil the surface to avoid sticking. The right pan can make the difference between a flawless sandwich and a sticky mess.
Keep the Patties Even
Uneven patties cook at different rates, leading to uneven texture. Use a measuring cup or a small ladle to scoop the same amount of batter into each patty. This small step guarantees each sandwich is as delicious as the next.
Creative Twists and Variations
This recipe is a playground. Here are some of my favorite ways to switch things up:
Mediterranean Melt
Swap the oregano for a teaspoon of sun‑dried tomato paste and add a handful of chopped Kalamata olives. The salty olives and sweet tomato paste give the sandwich a Mediterranean flair that’s perfect for summer gatherings.
Spicy Sriracha Kick
Add a tablespoon of sriracha or a pinch of cayenne pepper to the cauliflower mixture. The heat pairs beautifully with the creamy cheese, creating a sandwich that’s both comforting and exhilarating.
Herbed Yogurt Dip
Serve the patties with a side of Greek yogurt mixed with fresh dill and lemon zest. The tangy dip cuts through the richness, providing a refreshing counterbalance that keeps the palate clean.
Nutty Crunch
Top each patty with a handful of toasted pine nuts before cooking. The nuts add a delightful crunch and a subtle nutty flavor that elevates the sandwich to new heights.
Vegan Version
Replace the eggs with a tablespoon of flaxseed meal mixed with 3 tablespoons of water (let sit 5 minutes). Use a vegan cheese blend and plant‑based milk. The result is a creamy, satisfying sandwich that’s entirely plant‑based.
Breakfast Boost
Add a handful of sautéed spinach and a splash of cream cheese to the batter. Serve with a side of fresh fruit. This variation turns the sandwich into a hearty breakfast that fuels you for the day.
Storing and Bringing It Back to Life
Fridge Storage
Cool the patties completely, then wrap each individually in parchment paper and place them in an airtight container. Store in the fridge for up to 3 days. When you’re ready to eat, reheat in a skillet over low heat for 2–3 minutes, or microwave for 30 seconds.
Freezer Friendly
After wrapping, freeze the patties on a parchment‑lined tray for 1 hour, then transfer to a freezer bag. They’ll keep for up to 2 months. Thaw overnight in the fridge before reheating as described above.
Best Reheating Method
Add a splash of water to the pan before reheating; the steam will help the cheese re‑melt without drying out the cauliflower. Cover the skillet for the last minute to trap the steam, ensuring a moist, gooey interior.